|
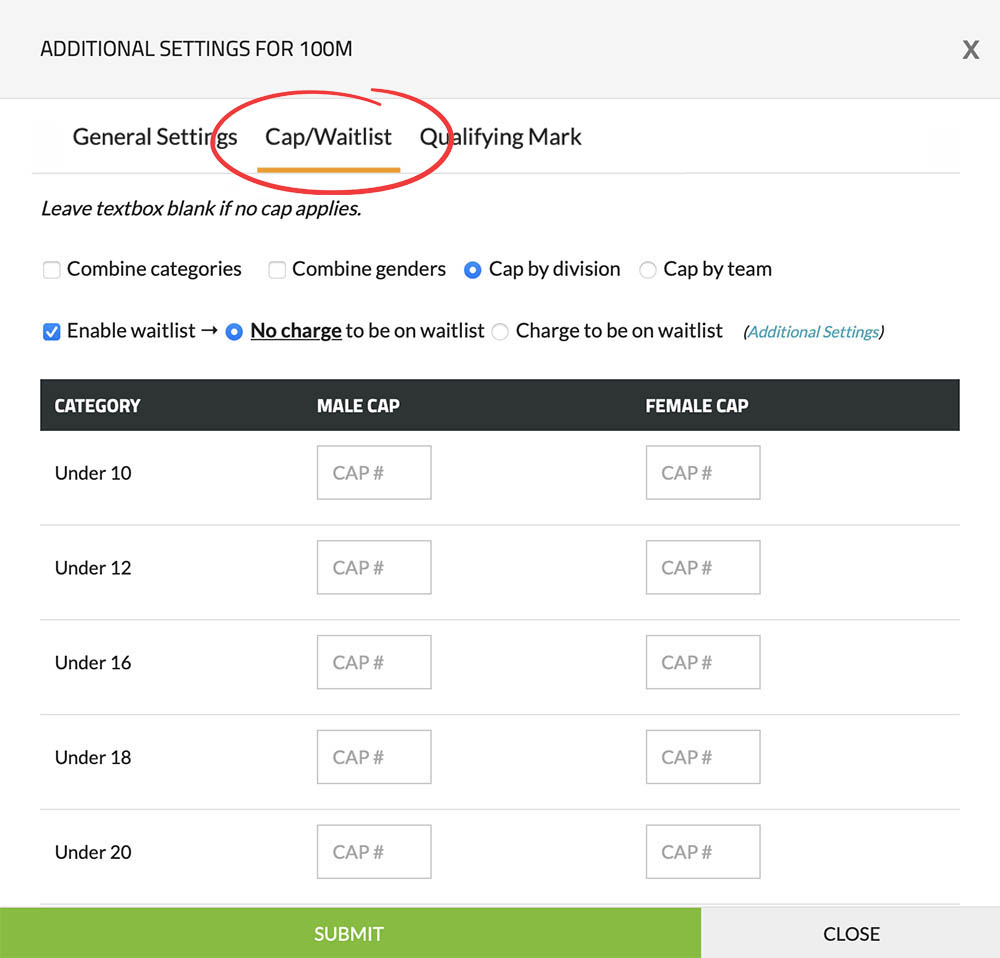
Combine categories
If you have set up different categories, but wish to have the registration limit apply to all categories combined, you can do so by setting the limit to the total number of registrations allowed across all categories. |
|
Combine genders
If you allow different genders to register, but wish to have the registration limit apply to all genders combined, you can do so by setting the limit to the total number of registrations allowed across all genders. |
|
Cap by division
If you want the registration limit to apply to all registrants within a specific division. |
|
Cap by team
If you want the registration limit to apply to registrants on specific teams within a particular division, such as allowing only three registrants per team. |
|
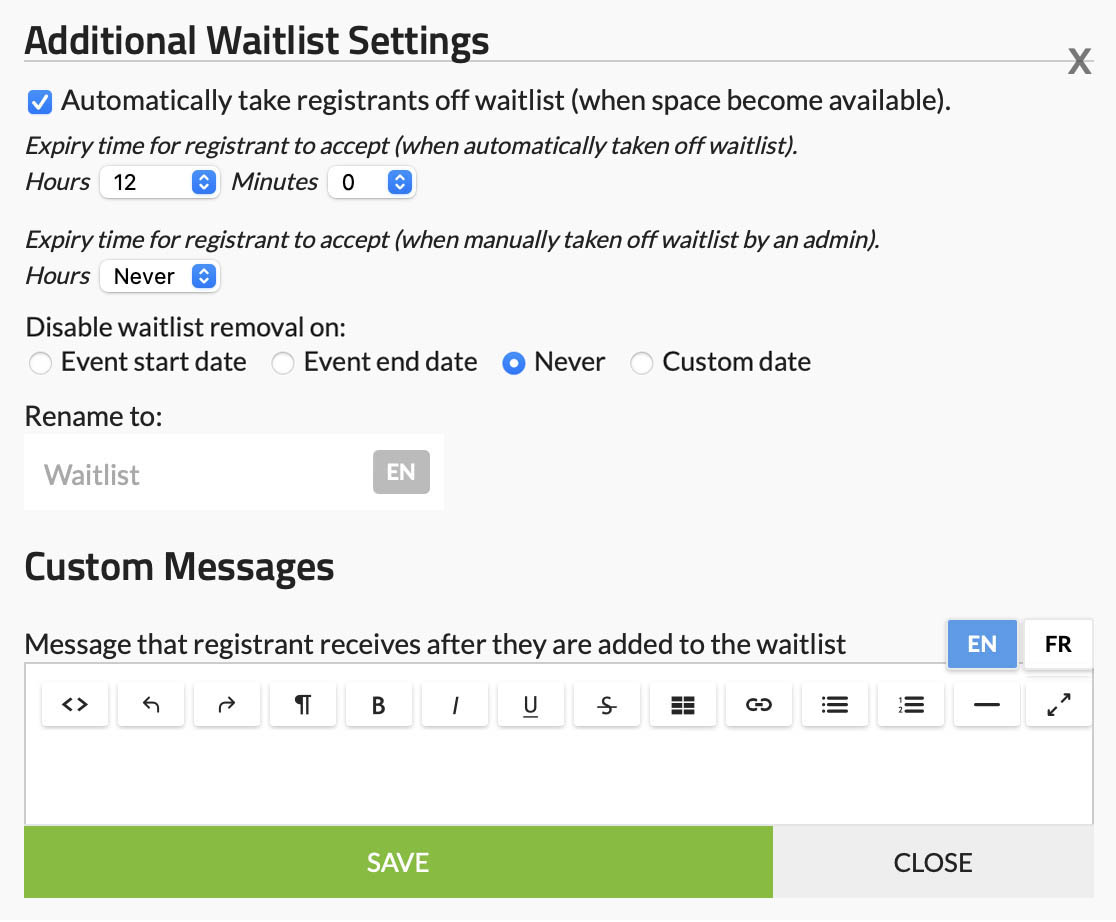
Enable waitlist
If you want to continue collecting registrations after your registration limits have been reached.
|
|
Cap #
This is the textbox where you can enter the registration limit. |
Registration limits & waitlist
With our system, you have the option to set registration limits for your event or club, which can be based on the total number of participants, as well as categories, divisions, gender, team, or a combination of each. You can also enable a waitlist to keep collecting registrations after you've hit your limits.
To access the settings for managing your registration limits/waitlist, you need to first create a registration form. You can find these settings under "Step 3: Division Information" ("Step 3: Membership Types" if a membership page).
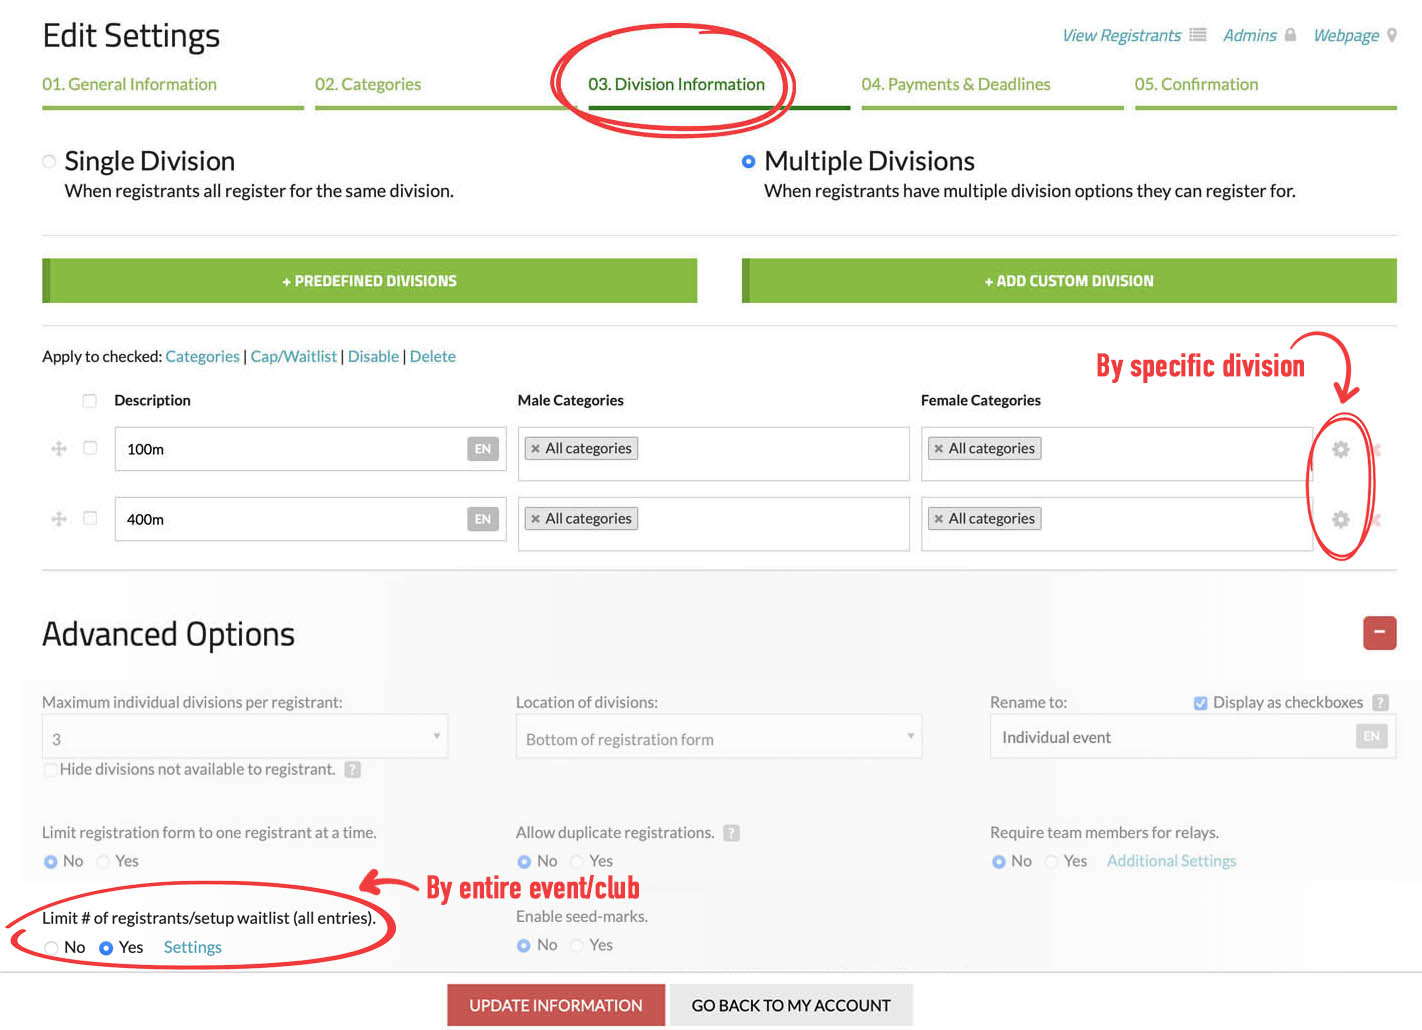
Below is what the interface to manage your limits and waitlists looks like (note: In case you clicked on the "gear" icon located to the right of a particular division, please make sure to switch to the "Cap/Waitlist" tab).
Settings