|
Menu text
This text serves as the label for the menu button. |
|
Title
This text is used as the title of the page. |
|
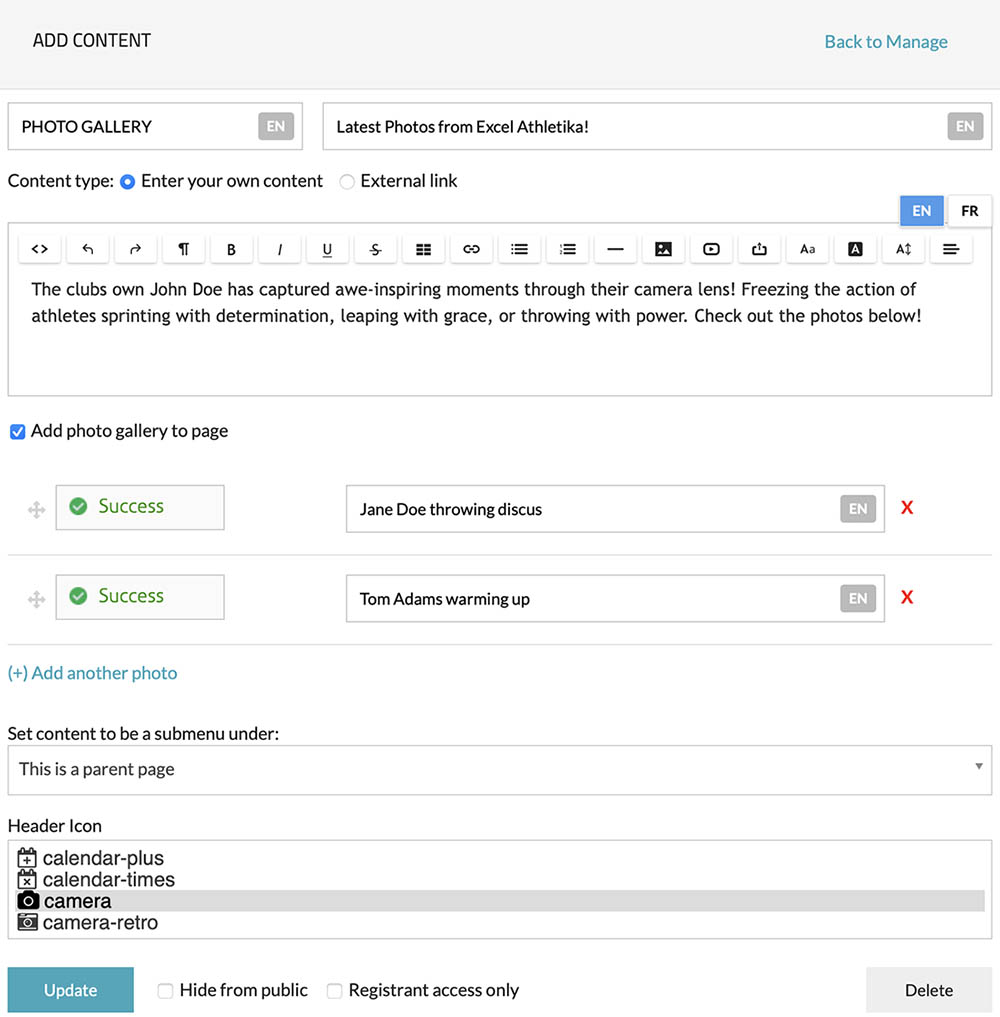
Enter your own content
Enables you to utilize our editor to input your own custom content. |
|
External link
If you wish to establish a link from the menu button to an external website. |
|
Add photo gallery to page
If you want to incorporate a photo gallery into your page. |
|
Set content to be a submenu under
Provides the functionality to create a submenu option beneath a main menu item. |
|
Header Icon
The icon that is displayed to the left of the title. |
|
Hide from public
Enables you to hide the page from public view. When enabled, only you as an admin will be able to access and view the page. |
|
Registrant access only
Provides the capability to restrict access to the content exclusively to individuals who are registered for your event or club. |
Setting up your webpage
Each event, club, or organization can create their own customizable webpage using our system, which serves as a valuable place to provide additional information to your participants.
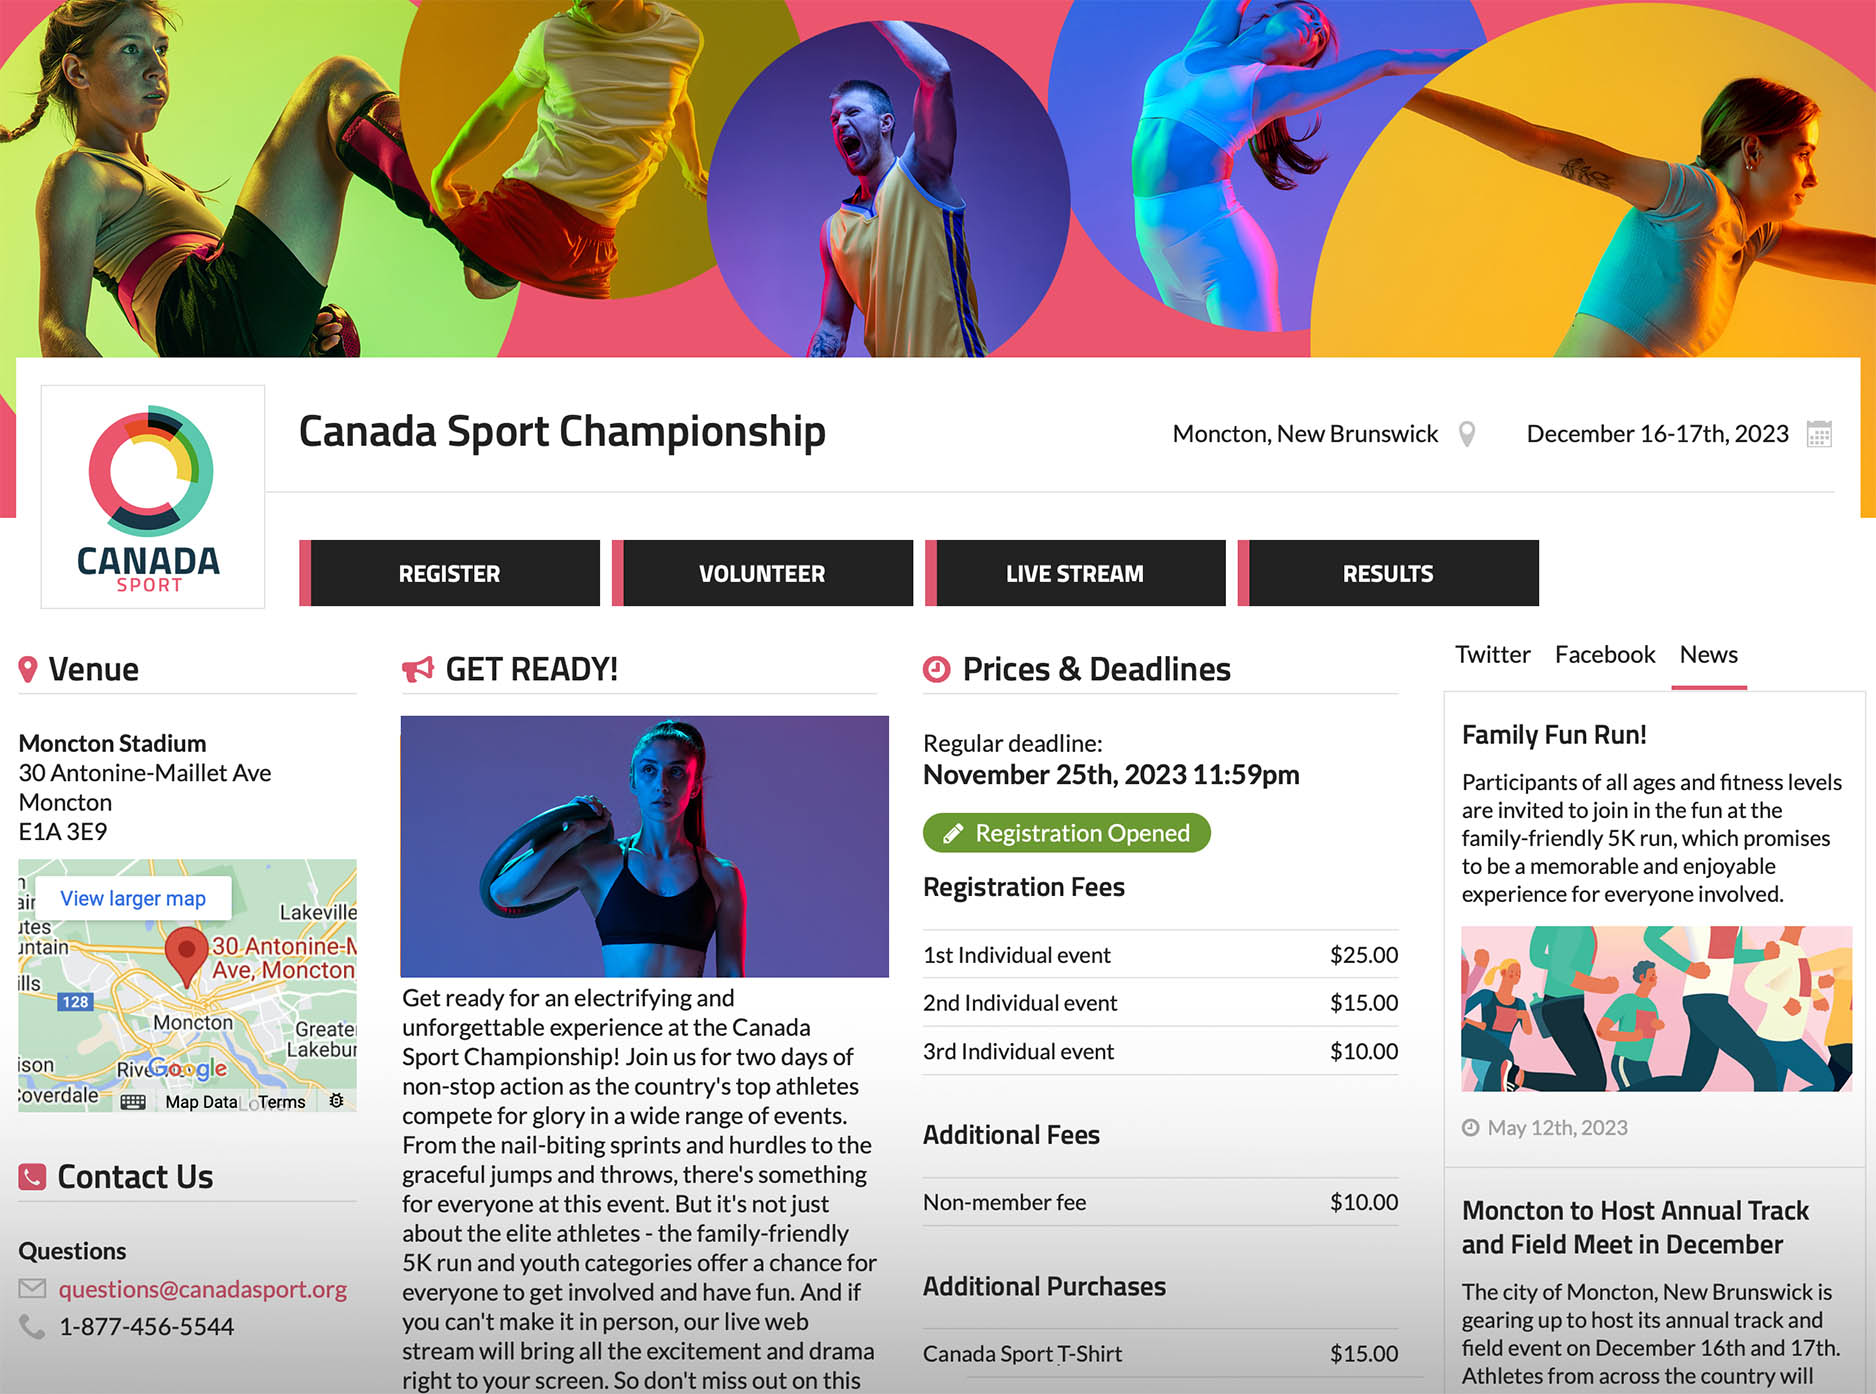
For further information on creating your webpage, please click on the sections below.
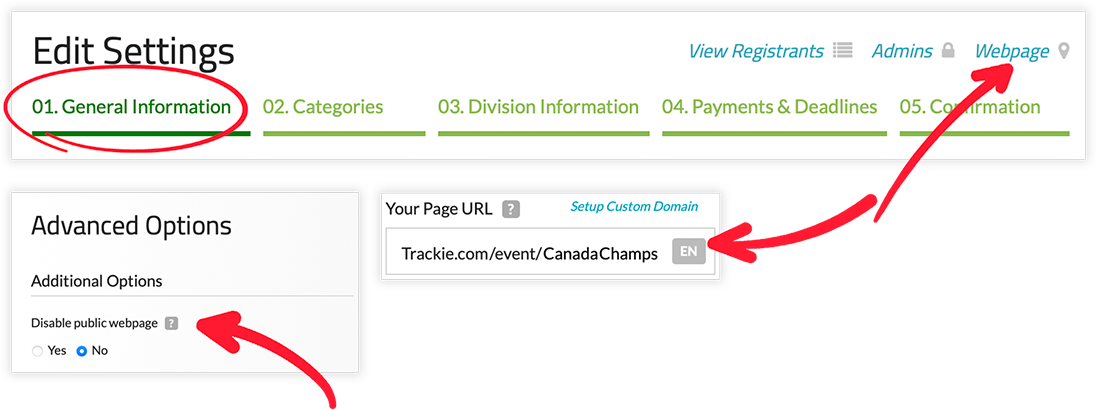
To setup a webpage, you need to first create a registration form. After creating, navigate to "Step 1: General Information" and the "Advanced Options," then set "Disable public webpage" to "No" (If set to "Yes," your webpage URL will redirect to your registration form.)
Customizing your webpage URL is possible under "Step 1: General Information" and the setting "Your Page URL." A link to your webpage can also be found at the top right corner of most admin pages.
Last updated: May 28th, 2023
When you are viewing your webpage and are logged in as an administrator you will see an "Admin Options" section as well as "Edit" button next to editable content. To add additional content to your webpage click on the "Additional Content" button. This will display the interface as shown below.
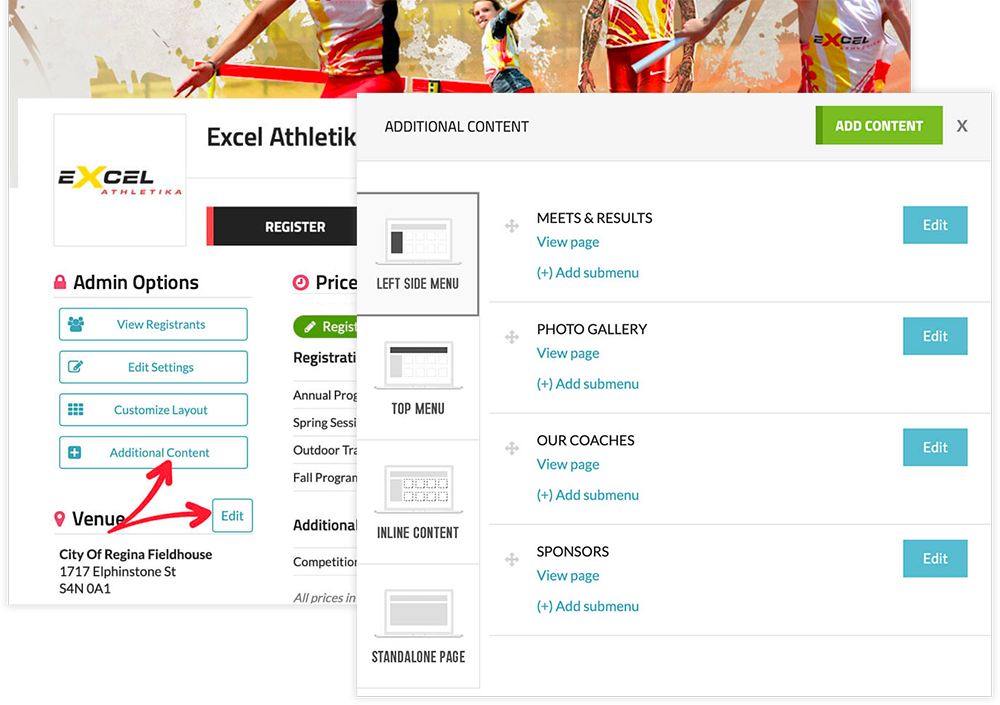
When creating additional content you have four options:
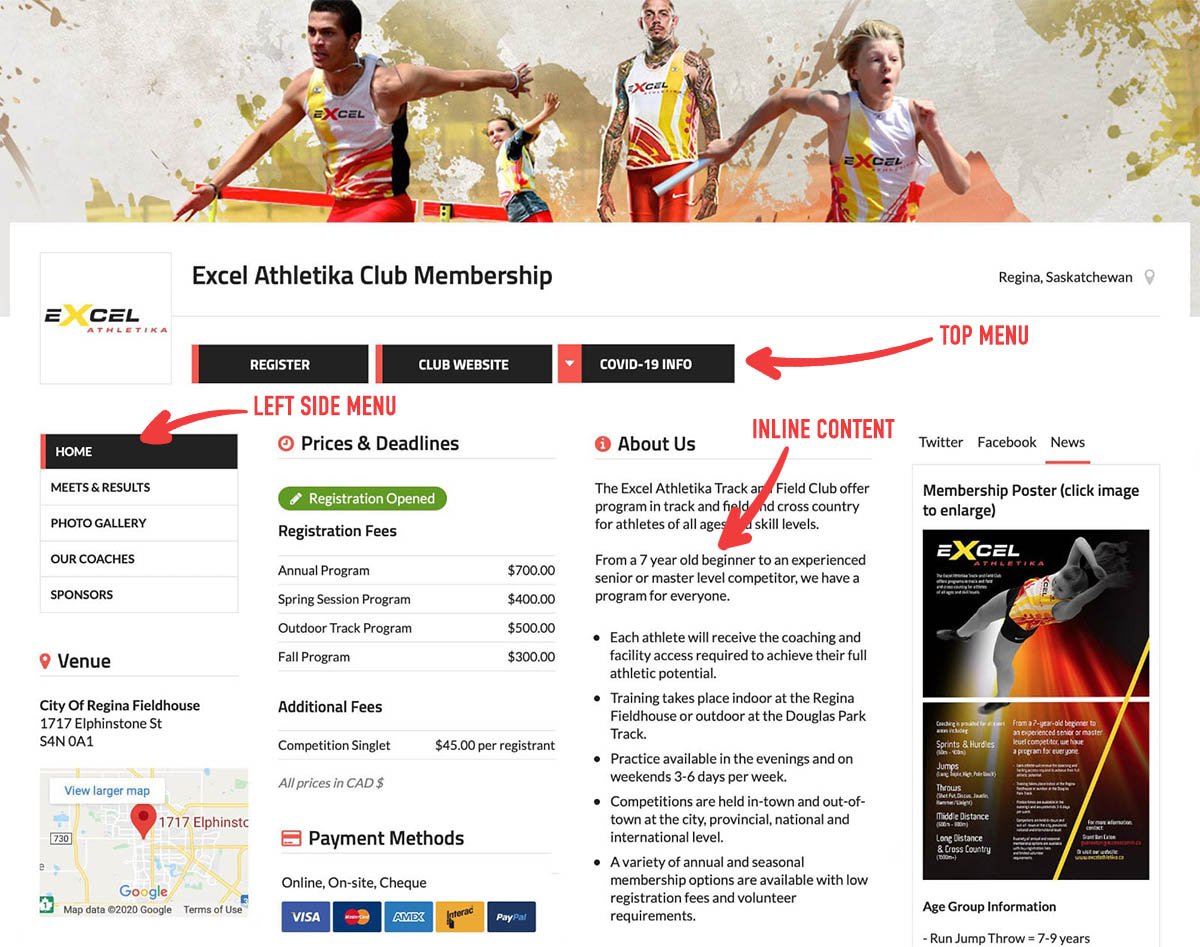
- Left Side Menu: You can create an external section on your webpage and include a link to it in a left side menu.
- Top Menu: You can create an external section on your webpage and include a link to it in the top menu.
- Inline Content: You can generate inline content within the main section of your webpage. Be aware that certain inline content, such as Venue, Prices & Deadlines, etc., is dynamically generated based on your page settings.
- Standalone Page: You can create a standalone page that can be linked to as needed.
When editing additional content, the interface will display like the following:
Settings
When creating "Inline Content", the options for "Menu text", "External link", "Set content to be a submenu under", and "Add photo gallery to page" are not accessible.
Last updated: May 28th, 2023
We provide you the ability to add your own news feed on your webpage. To add news items you can follow these steps:
- Log in to your account at https://www.trackie.com/login/
- Navigate to your Webpage.
- Click on the "Manage News" button.
-
This will open the following interface:
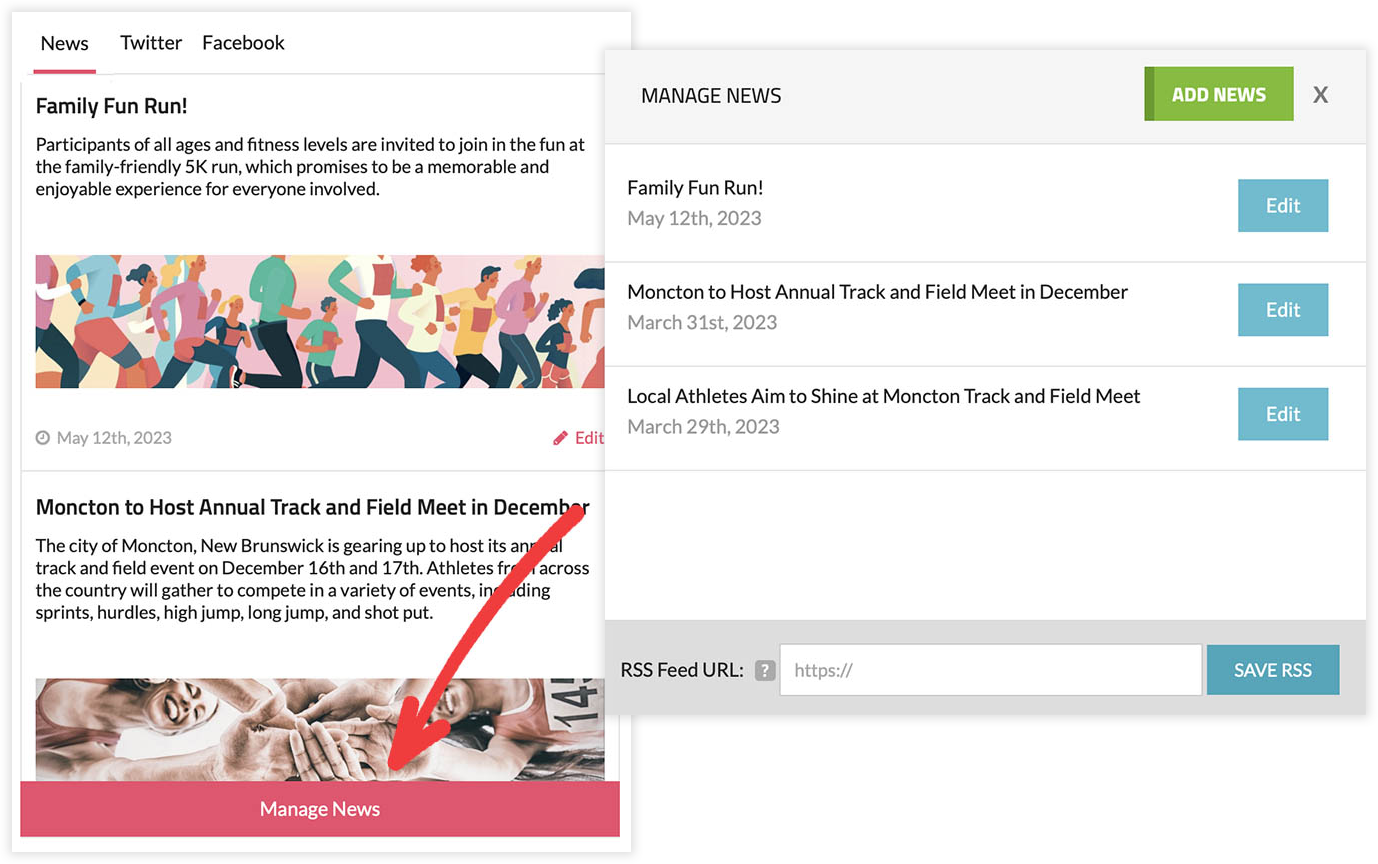
Note: Alternatively you can access "Manage News" by navigating to your event or club settings, then under "Step 1: General Information" and the "Manage News" button.
Settings
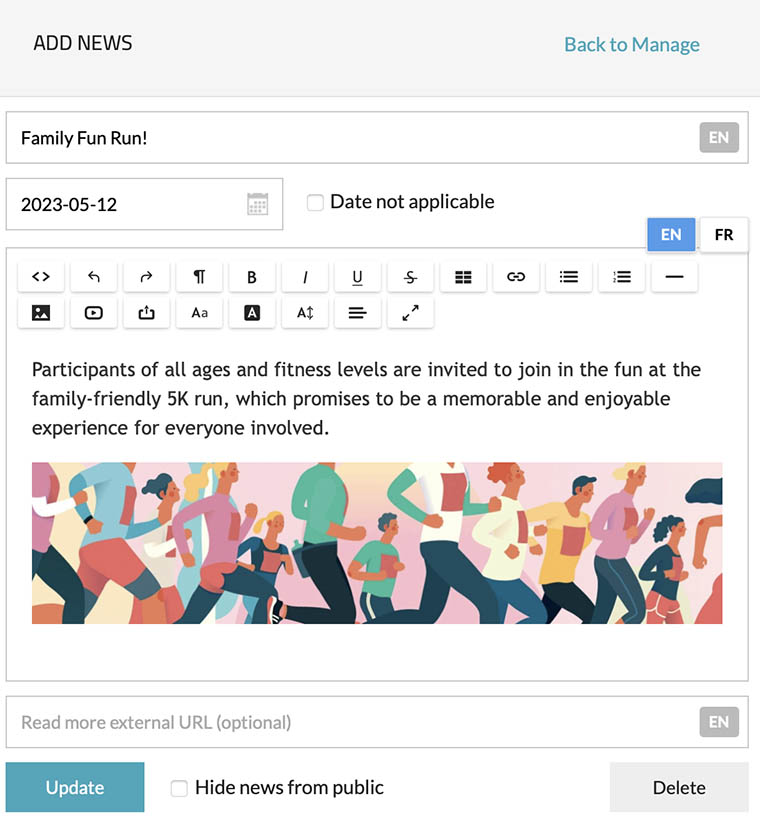
To add a news item, simply click the green "Add News" button.
To edit a previously added news item, click the blue "Edit" button.
The interface for adding or editing news is presented in the following format:
You have the option to input a title, date, content, and an external link using the provided fields.
If you wish to integrate an external RSS feed into your news feed.


Last updated: May 28th, 2023
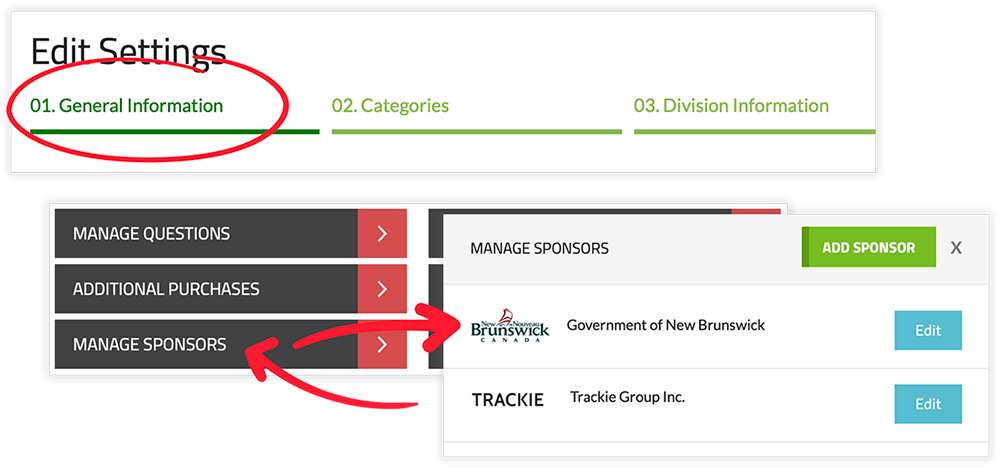
We offer you the capability to include a list of sponsors on your webpage. To add sponsors, you can follow these steps:
- Log in to your account at https://www.trackie.com/login/
- Navigate to your event or club settings.
- Click on the "Manage Sponsors" button under "Step 1: General Information".
-
This will open the following interface:
Note: Once you have sponsors added, you can also access the "Manage Sponsors" feature on your webpage by clicking the "Edit" button located next to the title "Sponsors".
Settings
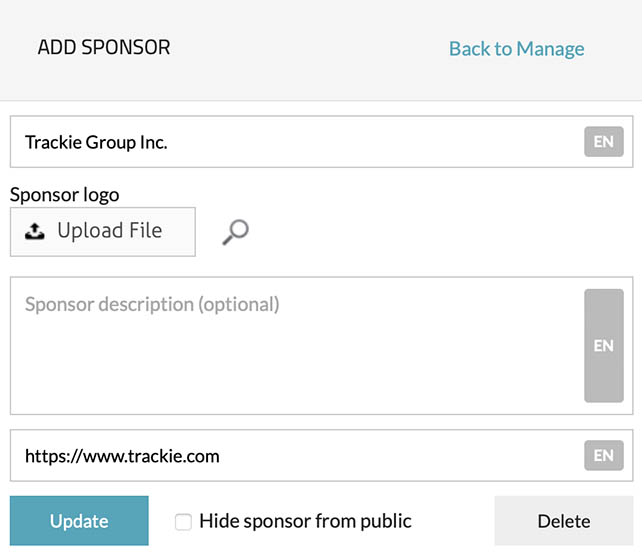
To add a sponsor, simply click the green "Add Sponsor" button.
To edit a previously added sponsor, click the blue "Edit" button.
The interface for adding or editing sponsors is presented in the following format:
You have the option to input a title, logo, description, and an external link using the provided fields.

Last updated: May 28th, 2023
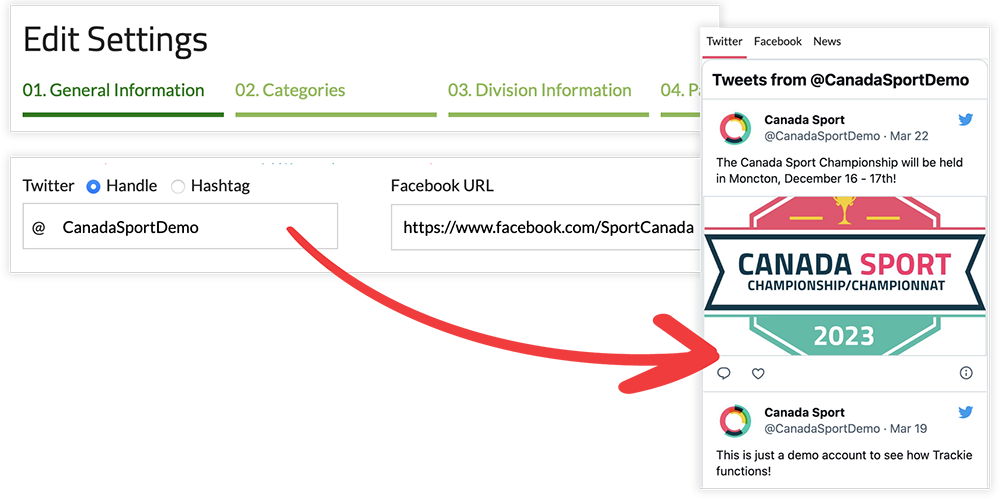
We offer you the ability to integrate your Twitter and Facebook feeds.
- Log in to your account at https://www.trackie.com/login/
- Navigate to your event or club settings.
- Under "Step 1: General Information", enter your twitter username (or hashtag) and Facebook URL.
-
After adding them, a social media widget will be automatically integrated into your webpage.
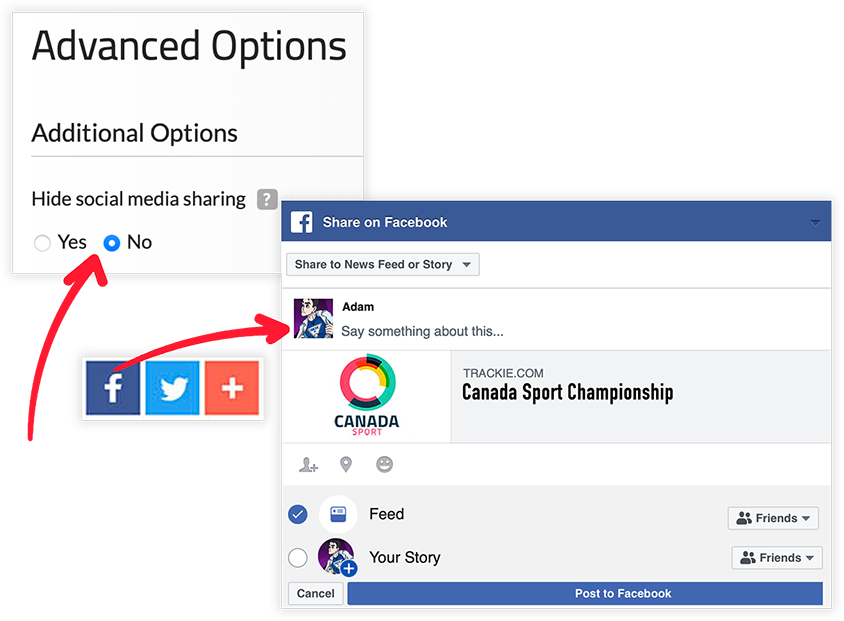
Additionally, we provide a convenient method for visitors to share your webpage on different social media platforms. You can find this setting under "Step 1: General Information" and the "Advanced Options" section labeled as "Hide social media sharing". When this setting is set to "No", we will automatically add a social media sharing widget to your webpage.
Last updated: May 28th, 2023
When you are viewing your webpage and are logged in as an administrator you will see an "Admin Options" section. To customize your layout click on the "Customize Layout" button. This will display the interface as shown below.
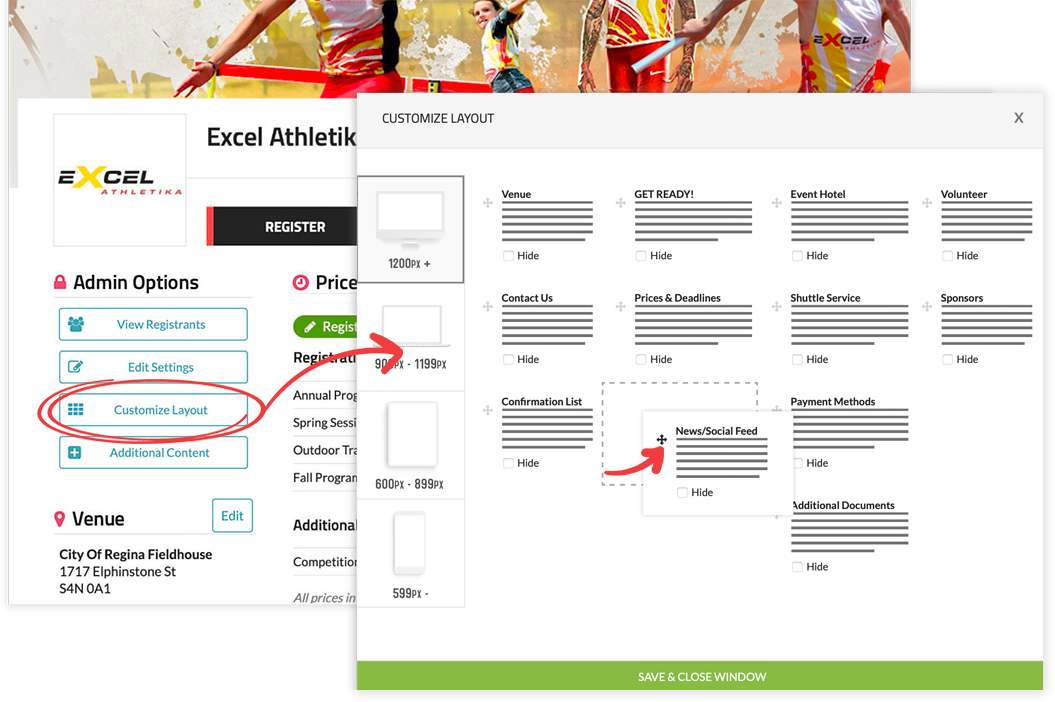
When customizing your layout, you have the following options:
- Drag and Drop: You can rearrange each section by dragging and dropping them to your desired location.
- Hide: Enables you to hide specific sections as desired.
- 1200px +: Layout for larger displays, such as desktop computers or larger laptops.
- 900px - 1199px: Layout for displays, such as smaller laptops or larger mobile devices.
- 600px - 899px: Layout for displays, such as tablets or larger phones.
- 599px -: Layout for displays, such as smaller mobile phones.
Last updated: May 28th, 2023